Pathloss 5 - Import links from text file
This is a step by step procedure for importing link text files. Usually the link text files are delimited with commas or tabs, but they can also be fixed width. Pathloss 5 is flexible enough to read either.
Example link text file in CSV format:
Site name 1,Site name 2,Latitude 1,Latitude 2,Longitude 1,Longitude 2,Elevation 1(m),Elevation 2(m),...
Woking,Fairview,55.47972222,55.83722222,-118.74722222,-118.59666667,925.61,574.02,...
Fairview,Brownvale,55.83722222,56.07333333,-118.59666667,-117.87972222,574.02,612.84,...
Beaverlodge,Demmit,55.21391667,55.46194444,-119.26891667,-119.88944444,928.60,834.99,...
Contents |
Step 1 - Open text (CSV) file
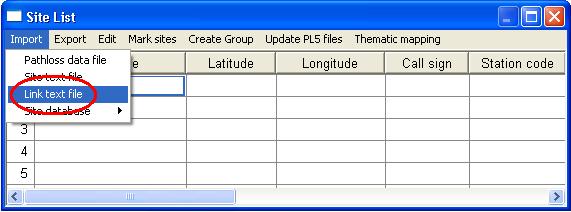
Click View - Site List to bring up the Site index. You can also click the Site list button on the toolbar.
Click Import - Site text file
A file open dialog box will appear. Select the text file you would like to import and click Open
Step 2 - Select text file type
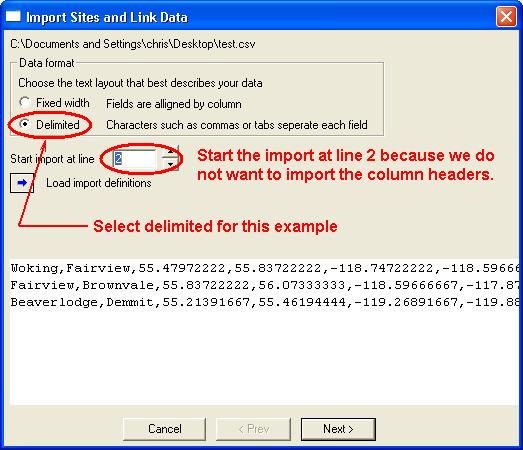
This is a comma delimited file with column headers. Select Delimited and because we do not want to import the column names, set Start import at line to 2.
Step 3 - Select delimiter
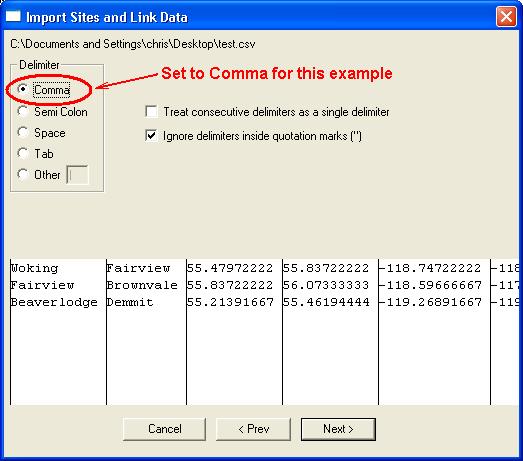
Click the Next button. Make sure that the delimiter is set to Comma and click the Next button.
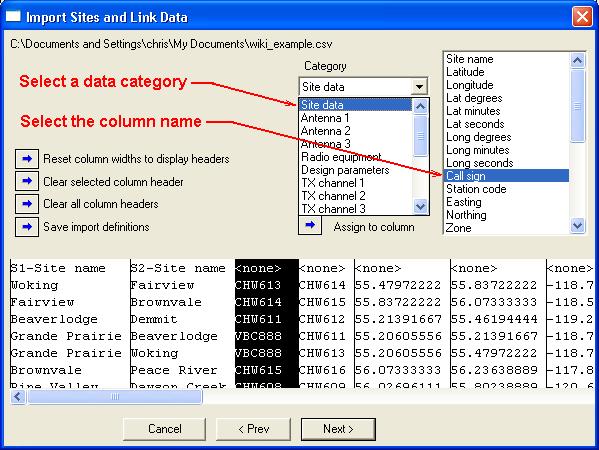
Step 4 - Assign column names
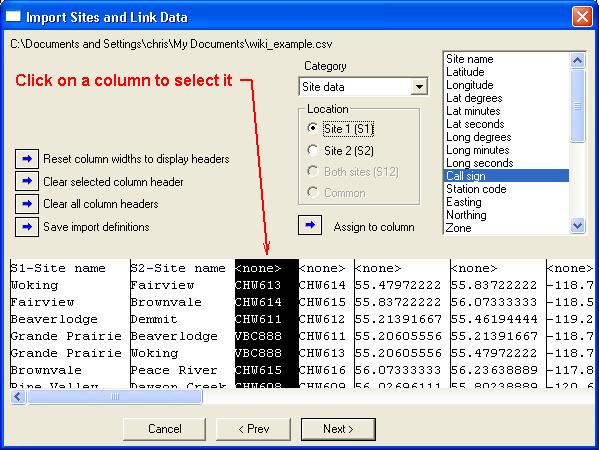
Click on a column to select it, for each column you need to:
Select the appropriate data category and then select the column name to assign.
Note: It may be useful to leave the "Start import at line" from the second step above at 1. This will make assigning the column headers much easier. One the assignments are complete you can click the <Prev button to the first window and set the "Start import at line" to 2.
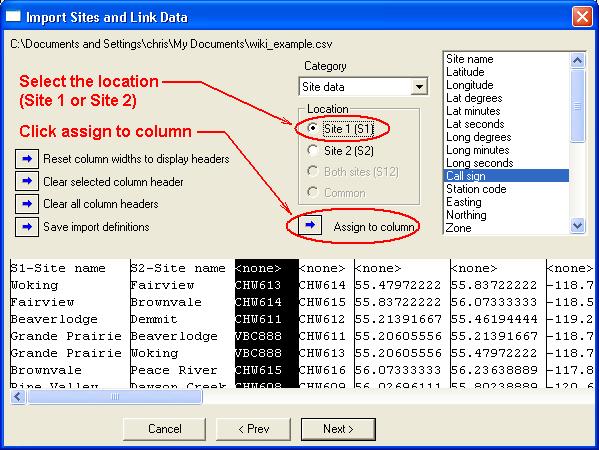
Set the location (Site 1 or Site 2) and click Assign to column
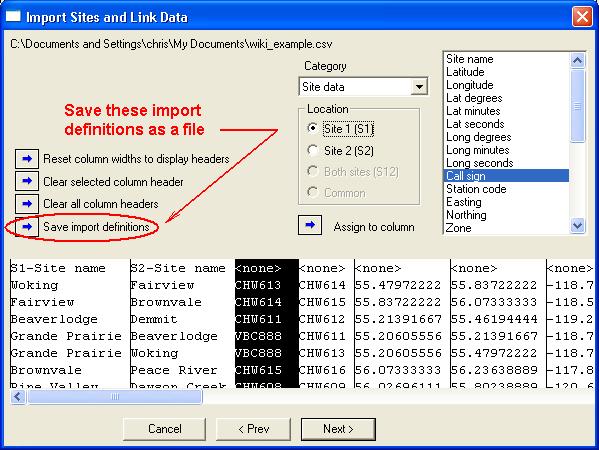
Once all columns have been assigned, you can save these import definitions in a file. This file should be included with the text(csv) file when sending to other users.
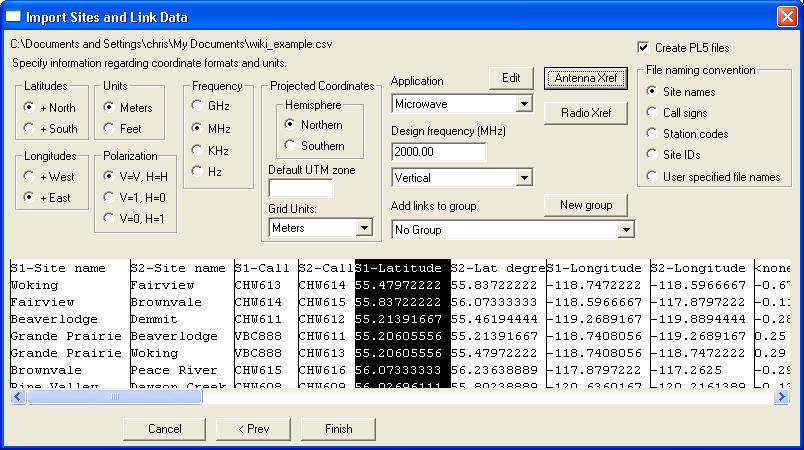
Step 5 - Verify coordinate and group settings
For this example we need to set the Longitude to +East. Normally the Eastern hemisphere is positive and the Western is negative. Depending on the source of your coordinates you may need to change the hemisphere you are in to positive. The same applies to Latitudes and whether they are in the North or South hemisphere.
At this point you can also specify the group you would like the sites to appear in, or you can also create a new group to add the sites to. For more of groups see Pathloss 5 - Using groups
Click Finish to import the sites into your site list.

